 |
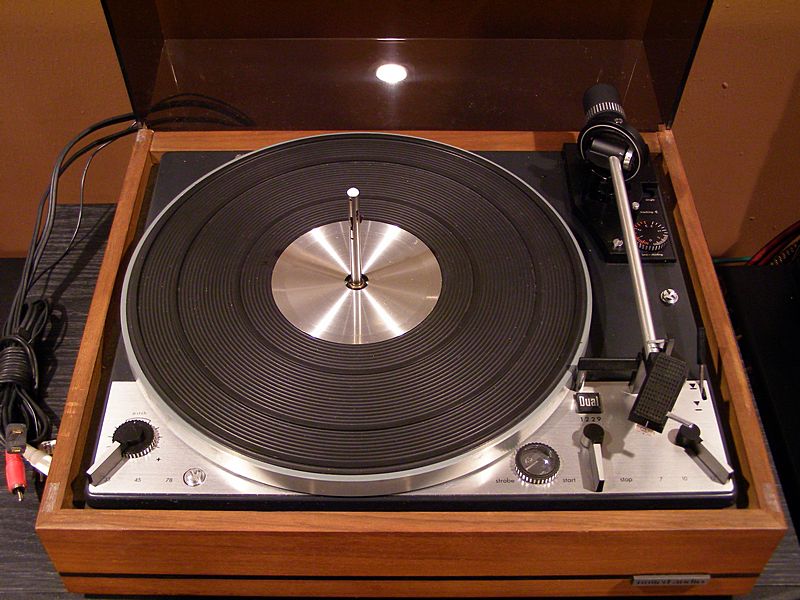
| Dual 1229 |
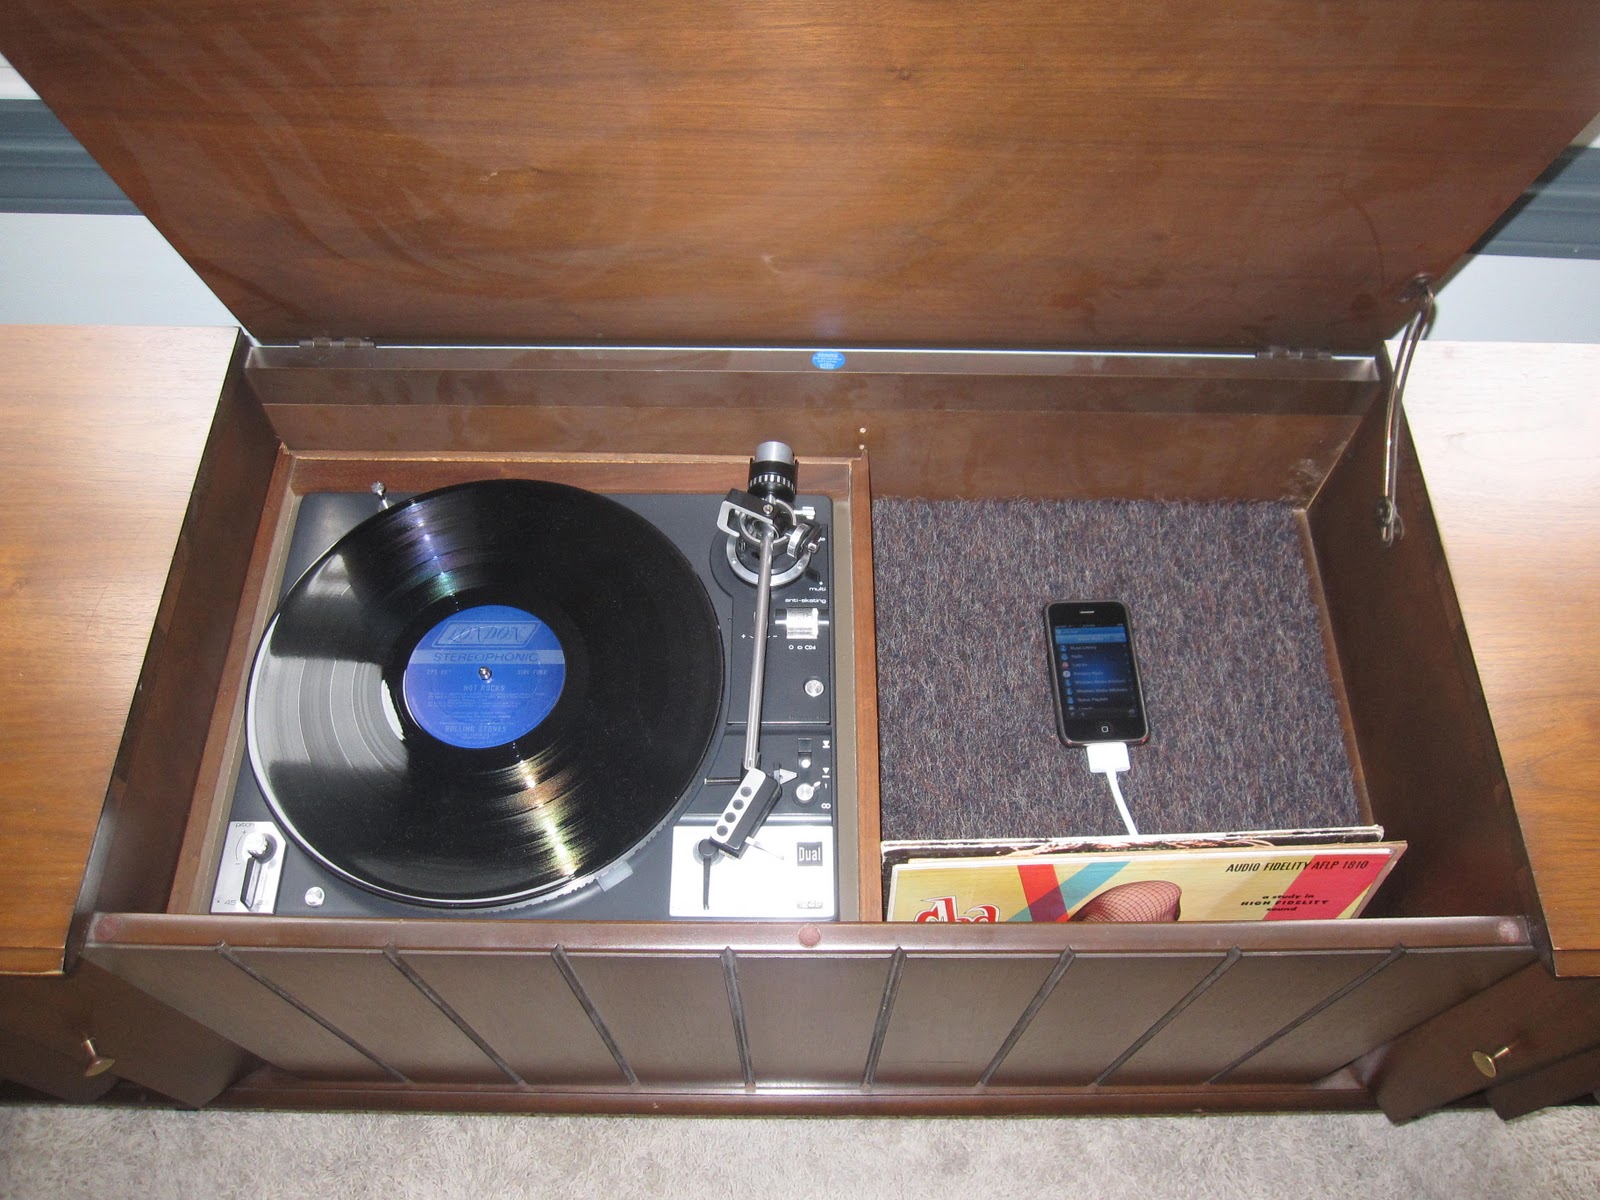
The record player is the second most important component of the whole system. It’s going to be highly visible and as an ex-indie rocker from the 90s, I had to be sure that it struck the right balance of obscure and quality. Like a Fender Mustang.
After an obscene amount of obsessing, I settled on a Dual. It’s German. They sound good. They look good. At the time they were seen as premium items. Collectors love them. And amazingly, it has the exact dimensions of where it needs to fit. After a couple weeks, a 1249 popped up for cheap one eBay and I pounced. The seller was a bit obsessive compulsive, his unpacking notes were incredibly detailed:
I have packaged your turntable very carefully and I would recommend that you the follow these steps in opening the package, removing the turntable components from the box and reassembling and setting it up. You may want to print the following steps when you receive the package so that they will be easier to access. If you are familiar with the set-up process, please disregard these steps. I had the turntable completely set up and playing a record prior to packing it up for you. I want you to enjoy the turntable and fully experience its fine performance capability.
· Open the package on the address side by carefully cutting the sealing tape without penetrating the package.
· Remove the folded paper material from above the turntable, noting the Dual 1229 manual which I have included which is very similar to your 1249 belt-driven model.
· Gently lift the wrapped dust cover, removing any packaging which adjacent to the inner cardboard box material.
· As you carefully un-wrap the bubble pack from around the dustcover, please note the small baggie inside it which contains the counterbalance, turntable spindles and cartridge, each thoroughly wrapped. Be careful not to drop the baggie or its contents as you un-wrap the dust cover.
· Next, remove the wrapped turntable platter from above the turntable chassis. This is a heavy cast-aluminum platter. I would recommend not un-wrapping it until you are ready to place it on the drive platter on the turntable chassis later in the assembly process.
· Next, remove the turntable chassis in its wooden base from the package. It also is wrapped carefully with bubble pack. Please be careful not to disturb the inner mechanism under the turntable chassis. The power cord, phono interconnects and ground wire are carefully placed underneath the wood base. You are now ready for the reassembly process.
· Carefully un-wrap the wooden turntable base and chassis and place it on a solid surface where you can complete the setup. Carefully turn the (3) chrome lock-down screws clockwise until the heads are flush with the chassis and the chassis is fully suspended on its springs. Make sure that the power cord, interconnects and ground wire are outside the turntable base ready to connect to your amplifier or receiver.
· Carefully un-wrap the cast platter and gently place it on the inner belt driven platter. (this is one of the most critical parts of the assembly). It should seat easily when properly centered. The chassis should now be freely suspended for vibration isolation.
· Locate the baggie containing the counterbalance, spindles and Grado cartridge. Remove the twist tie from the tone arm, ensuring that the tone arm remains locked by its retainer clip on its rest holder.
· It is important not to power up the turntable until full tone arm balancing and set up is complete. The mechanism will tend to cycle and turn off because of the vibration in transport, and if the arm is not balanced, additional friction can damage the cycling mechanism.
· Locate the counter balance and the small knurled knob at the rear of the tone arm near the gimbal. The small numbered ring on the gimbal should be set to zero and the anti-skate control below the tone arm should also be set to zero. Ensure that the tone arm remains in the locked position. Un-thread the knurled knob by turning it counter-clockwise until you are able to slide the counter balance into the rear of the tone arm with the guide slot facing downward. Do not fully tighten the knurled knob until the tone arm is balanced to zero grams following the installation of the Grado phono cartridge in the next step.
· Locate the cartridge and the tone arm pivoting handle on its right side at the place where the cartridge interfaces to the end of the tone arm. Pivot the handle 45 degrees with the tone arm. Inspect the underside of the cartridge head shell mount and the head shell connections themselves to see how they interface together. Ensure that the stylus (needle) guard is still on the cartridge and place the cartridge in the tone arm by carefully placing the rear of the head shell (with 4 pins visible) against the inner circuit board at the end of the tone arm, and then lifting the front of the head shell until it aligns with the tone arm. Then pivot the head shell handle to a 90 degree angle with the tone arm, locking the head shell in place.
· (This next step is one of the most critical). Again, ensure that the tracking force ring at the rear of the tone arm and the anti-skate controls are both set to zero. With the tone arm locked to its rest and the counterbalance loosely affixed to the rear of the tone arm so that it can be slid backwards and forwards, very carefully remove the stylus guard by sliding it forward off of the cartridge. The stylus is now exposed and can be easily damaged.
· Very carefully release the tone arm lock and place the tone arm to a position where it would almost track a record, while holding the tone arm so that the stylus does not touch anything. Then very carefully, slide the counterbalance forward or backward until the tone arm “floats” at a point with the stylus nearly at record height, not moving down or up. The counterbalance will almost be as close to the gimbal as possible. When the tone arm “floats”, you have set the mass to a true zero grams. Now adjust the stylus mass ring to 1.7 grams (the scale is calibrated to grams) and the anti-skate control on the center (elliptical) scale to 1.7 grams also. Place the tone arm back to its rest position and lock it again. You are now ready to interface your new turntable to your amplifier.
· Before interfacing the turntable to your amplifier, I would recommend first releasing the tone arm lock and plugging the power cord into an outlet. Place the cueing lever in a position so the handle is towards the rear of the turntable. When you plug it in, the tone arm will probably cycle (you do not want to do this prior to balancing the tone arm) and return to the rest. If it attempts to play a record and there is no record on the platter, operate the cue level by pulling it forward, so that the stylus does not touch the rotating platter. This is very important to prevent stylus damage. Next, prepare to plug the audio cables into your amplifier.
· Place the red marked cable into the right channel magnetic phono cartridge input and the opposite color into the left channel phono input. Be sure to attach the ground wire to the ground terminal of the amplifier. This will ground motor hum from being heard.
· You are now ready to listen to your records. Place a clean record on the platter and lift the cue lever by moving it to the forward position. This will lift the tone arm. Gently place the tone arm over the record starting groove, release the cue lever gently to lower the tone arm and HAPPY LISTENING (make sure the volume is turned down on your amplifier prior to this step). You may also select the “start” function by sliding the lever to the right. The arm will pick up off the record and return to its rest position at the end of play.
Dual 1249 Turntable: $225